Saturday, March 26, 2022

The Tale of a DIY CW Paddle Key

The Tale of a DIY CW Paddle Key


My first DIY Paddle Key 

Way back in 2014 I built a two paddle cw key from basically trash; an empty Tic-Tac box, piece of phone cord, a bunch of popsicle sticks, 3 screws, 3 nuts and a 3.5mm Stereo phone plug. 
With this I attempted to practice morse code sending with the Ham Gadgets Pico-Keyer.
The popsicles sticks levers proved to be too stiff and I swapped them for some FR4 PCB material cut into paddle shapes.
Fast forward eight years and the PCB levers were getting too limber. Squeezing the paddles together cause the PCB levers to curve around the center bolt contact without touching.
In replacing the PCB paddles with a couple pieces of spring steel, I decided to do a redesign and ditch the Tic-Tac box for an open frame key. 

Old PCB levers, trial fit of steel levers
decided to get rid of Tic-Tac box

I used a scrap piece of 1/2 inch plywood for a wood base and a wooden lever mount. I glued and stapled the two pieces of wood together, drilled holes and added a ring terminal and more hardware to the center bolt. I attached the steel levers with a bolt, ring terminal and washer on each paddle. Soldered the three ring terminals to the phone cord, Secured the phone cord with zip ties and placed heat shrink tubing over the paddle ends.   

Finished (?) Two Paddle CW Key

The action is a little stiff, I might have to bevel the sides on the forward end of the wooden level mount to allow the levers to easily touch the center bolt.
As I have the $12 Chinese Paddle as my main paddle this key will serve as a backup.

Monday, March 7, 2022

CW Key - Double Paddles - eBay $12

05 Mar 2022

CW Key - Double Paddles - eBay $12

Made in China 

My G90 has a CW decoder with the built keyer if needed. I tried DIY paddles with some varying success. These were build using all sorts of rubbish, spring clothes pins, biner clips, broken hacksaw blades, an old 2 switch wired computer mouse, popsicles sticks, scraps of copper clad PCB material. etc. I even made a couple touch pad triggered FET switches in an altoid tin. They are not very appealing and tend to break easy and fall to bits. 
On eBay there is a dozen sites that offer what looks like CW paddles off the pages of thingiverse. These are from China and run around $12 as a kit and $25 assembled.

CW Paddles Kit Parts List

3.5mm stereo M-M cable (~4 Feet / 1.5 Meters) 
Plastic Box (6.5cm x 4cm x 3cm) in two parts; box cover and base.
Plastic Paddles (1 left & 1 right)
Red Wire (2.5 inches / 6.4 cm) 2 pcs
Black Wire (2.5 inches / 6.4 cm) 1 pc
Black Heat Shrink Tube (2.5 inches / 6.4 cm) 1 pc
3.5mm Stereo Jack w/ Nut
Brass Ring Terminals - Brass 3 pcs
Brass Bolt 1 cm -  2 pcs
Brass Bolt 2 cm -  1 pc w/ washer brass 2 pc
Brass Nuts - 2 pcs
Steel Bolt 2.5 cm - 2 pcs
Steel Spring 1.5 cm - 1 pc
Magnets - 4 pcs
Steel screws black 1 cm - 4 pcs 

CW Paddle Kit 

Tools I Used:

Soldering Iron w/ rosin core solder
Tip Cleaner
Continuity Checker
Wire stripper 
Hobby knife
Needle nosed Pliers
Flush Diagonal Cutter
Small Phillips screwdriver
Wire Crimper
"Helping Hands"
3X reader glasses

Tools I Used
Build Instructions:

Note: In fitting the Stereo Jack into the Base of the Paddle. I had to clean out the hole and flanges in the base of any excess material with my hobby knife.  Lightly sanding the plastic sides of the jack that sit next to the flanges would improve the fit. I had to gently scrape around the top of all the bolt holes to get the bolts started. Be sure all bolts are square to the part they will thread into.

1. Strip the three wires back 3.5mm/ 0.125" one side only.
2. Crimp ring terminals on wires,  solder ring terminal.

Soldering the crimp connection on ring terminal

3. Cut Heat Shrink into 6 pieces 1cm long. Shrink 1 piece of tubing over each ring terminal shaft. Hold on to remaining 3 pieces for later.
4. On the jack determine which solder terminals are the tip, ring and sleeve with continuity checker or ohmmeter. 
5. Check for fit by placing jack into the flanged hole in base. Sleeve solder lug should  be down. Use hobby knife, drill bit, sandpaper, etc to clear any material obstructing the jack placement. Keep clearing material until jack is a snug fit.
6. On jack gently bend the tip solder lug to the left side of jack and bend the ring solder lug to the right side of jack. (Standard set-up for right handed paddle operators)

Jack wires soldered and jack mounted to flange in base.
(notice I left the black sleeve wire  25mm/1.0" too long.)

7. Check for correct length of black wire to be connect to jack sleeve, place ring thru slit in base and fit into keyhole underside of base.  Black wire only needs to be long enough to reach past the sleeve solder lug.
8. Remove jack from base. Trim off excess black wire leaving enough to strip back 3.5mm/ 0.125". Trim both red wire back 3.5mm/ 0.125".
9. Place remaining cut pieces of heat shrink tube from step 3 on over each wire. Solder red wires to tip and ring. Solder black wire to sleeve.
10. Reinsert jack into flange and orient the jack so the sleeve lug is down be sure ring terminal goes thru slot to underside of base. Secure jack with nut provided.


Underside of base with sleeve ring terminal secured


11. The sleeve ring terminal on black wire is positioned so the ring terminal will fit into the keyhole over screw hole. Place one brass washer under ring terminal. Secure with the 2 cm brass bolt and second washer. The bolt is screwed all the way thru the base to form a post contact between the paddle positions on top of base. Don't over tighten.
12. Take one of the 1 cm brass bolts, place a brass nut halfway down the bolt. Position the tip terminal on red wire outside the left paddle over the screw hole, turn the bolt and washer into the screw hole. The terminal should be captured on the bolt between the nut and the paddle. Set aside for now.
13. Repeat step 12 for the terminal with the red wire connecting the ring of stereo jack and the right paddle. 
14. Use the 2.5mm steel bolts to attach paddles to the base. Do NOT over tighten. Just snug down enough so paddles swing without being lose.
15. Install the steel spring between the paddles, placing ends of spring into the indentation in each paddle. (May want to use a loop of string loosely around paddles to keep spring in place until paddle is adjusted and cover is on)


Adjusting the gaps between the paddle bolts and post contact.
(Notice I used the cover upside down to limit outward paddle travel
and keep from losing the spring, you could also use a loop of string.)

16. Adjust brass bolt in each paddle by screwing in or out to maintain an equal gap between each paddle with the center bolt. Once adjusted tighten brass nuts to keep wires in place next to paddle lever and lock the adjustment.
17. Install a magnet on the underside of each corner of the base by starting  a black steel screw into each magnet hole. 
18. Place cover over the base and secure by fully tightening the black steel screws.
(You may now remove loop of string from paddles as cover opening limits the paddle outward travel and keeps the steel spring secure.

Congrats,
 your $12 Chinese CW double paddle key is now complete. 
Let's celebrate by ordering a big dish of beef chow mein. 

Wednesday, February 23, 2022

K6ARK Antenna / G90 Back Yard Portable

 23 Feb 2022

With the temperature in the 50 degree F today, I decided to play radio in the yard to see if the K6ARK antenna kit I built as a 9:1 UnUn for an EFRW would tune up on the Xiegu G90 ATU.

AB1OP Minimal Portable Operation Bag

I am happy to report the Xiegu G90 was able to tune the K6ARK 9:1 UnUn EFRW to under 1.5 to 1 on the 80, 40 and 20 meter bands. I didn't do much else I played with the Xiegu G90 CW decoder on a couple transmissions running at 20-25 wpm at that speed my head can only tell that CQ was sent and a few scattered letters here and there.

AB1OP Portable Operations Equipment:

A) A medium capacity tactical style backpack ($40)
B) A 6Ah LiFePO4 battery ($30)
C) Old Android 4.4 KitKat 7" Tablet with VLS logger App ($50 back in 2014?)
D) 6000mAh USB power bank ($10) located between tablet and G90
E) DIY PVC Antenna winder (~$2)
F) Xiegu G90 20W Transceiver & Microphone ($450 new)
G) Earbuds ($1)
H) DIY CW paddles ($1.50 for stereo plug & PCB) on top of G90
I) DIY 9:1 UnUn in 80mm X 50mm plastic box. ($20 in materials)
J) DIY F connectors to Power pole connectors cable ($5)
K) Power Meter with Power pole connectors ($16 meter, $5 connectors)
L) DIY Fused power pole to white male connector cable with clamp on ferrite choke ($10)
M) K6ARK Kit as built to 9:1 UnUn modified for G90 ($20 kit, $5 mods)

Not Pictured:
N) Antenna wire 26awg 41 feet, Counterpoise wire 26awg 17 feet ($13 / 100 feet)
O) Two 7.2 meter (~21ft) telescoping Carbon Fiber fish poles. ($13 + $6 shipping each eBay - up to 4 weeks wait for delivery from China)
P) Strong and light cord 50-100 feet ($4-$7)
Q) Bungee cords to tie poles to stationary objects ($7)

Compare the size difference from the K6ARK and the M0UKD 9:1 UnUn

Here we can see the size difference of the two 9:1 UnUn(s) used for an EFRW antenna.
The K6ARK (attached to G90) extends only 1.25 inches beyond the UHF-BNC adapter.
The M0UKD (atop G90) extends almost 5 inches beyond the UHF-BNC Adapter.

Granted the M0UKD UnUn is built around a T130-2 toroid and a 80mm by 50mm project box. It has a lot of empty space in front of the toroid and the 4mm banana jacks protrude excessively out the front and the side. 

I will keep the M0UKD UnUn if I ever get a small (100W or less) linear amp for my rigs. 

The success of the K6ARK kit build is enough to order a 2nd K6ARK kit to be built as a 49:1 UnUn EFHW antenna to replace a project box built 49:1 UnUn based on a ft140-43 toroid. I already have the ft82-43 toroid, plenty 26 awg magnet wire and 1 inch diameter heat shrink tubing needed to modify the kit to the G90 power level. 

Monday, February 21, 2022

K6ARK Antenna Kit

 17 Feb 2022                                                                                        Ralph AB1OP 


K6ARK Adam is an active SOTA QRP operator. He has developed a small QRP Antenna (Matching) Kit currently sold on Amazon. The kit comes with your choice of either a Male or Female BNC connector as the feed point.

On his web site he has instructions of how to build the kit in one of three different configurations; 

1) 49:1 UnUn for EFHW End Fed Half Wave 
2) 9:1 UnUn for EFRW End Fed Random Wire 
3) 1:1 BalUn for a Dipole.

Website: https://k6ark.com/

My Build: A 9:1 UnUn for EFRW antenna

I decided to purchase a male BNC kit. I need to modify the kit
to handle the maximum power  my Xiegu G90 can produce (20W). I will build it as a 9:1 UnUn for a EFRW antenna to take advantage of the G90 built in ATU. 

K6ARK Kit (Male BNC Version)

 K6ARK Adam suggested for G90 use, adding an FT82-43 toroid to nest the FT50-43 toroid into. The combined toroids would increase the power handling to 30 Watts. 

Adam offered to send me additional 26 AWG magnet wire since the kit supplied 28.25 inches of wire. I had plenty on hand from other projects. I calculated I need at least 36 inches, I cut off 40 inches from my stock as insurance.

Replaced the 3/4 inch heat shrink tubing supplied in the kit with a 1 inch diameter piece of heat shrink tubing and added some additional small diameter pieces to tubing as needed. 

I also purchased some 2mm banana connectors to attach the radiating and counterpoise wire elements.

Additional pieces to modify kit for my G90
The female BNC was used as a heat sink when soldering the male BNC
Notice the 3.5X reading glasses 

 Following K6ARK instructions from his website I was able to complete the kit.
I did have to bring out the "helping hands" to hold on to the PCB while soldering.

a) Soldered the radiating and counterpoise leads to the PCB and pulled the leads thru the strain relief holes provided in the PCB.
b) Wind the 10 turns, twist a tap, wind 20 turns on the combined toroids.
c) Burned off the enamel on the three toroid leads. Arrange the leads to match the holes in the PCB and solder. 
d) Tilt the toroid windings and solder the male BNC to the PCB. 
e) Shrunk Tubing over the assembly to cover and protect the windings. 
f) soldered 2mm banana connectors on the short wires for antenna and counterpoise wires.

I also soldered 2mm banana connectors on a 41 foot 26 awg wire for the antenna and on a 17 foot 26 awg wire for the counterpoise. I shrunk red HS tubing on the antenna connectors and black HS tubing on the counterpoise connectors.

Complete EFRW antenna on a 1/2" PVC wire winder
The short PVC sections can be detached and used as insulators

Compare the new K6ARK EFHW portable antenna system with my portable HB EFHW system used during the 2020 ARRL Field Day.

HB EFHW compared to K6ARK EFRW
Green spool of support cord and UHF(PL-259) to BNC(female) adapter is common to both

HB EFHW consists of 
a) 49:1 UnUn based on a ft140-43 toroid in project box with a female BNC.
b) ~66 feet of 18 awg wire on a 9" spool.
c) 25 foot RG-8X coax with BNC male to male.
d) Large insulator to tie antenna wire to support cord.
e) UHF(PL-259) to BNC(female) adapter.
f) 100 foot spool of strong cord for support line.

K6ARK EFRW consists of:
a) 9:1 UnUn based on a combined ft50-43 & ft83-43 toroids on a male BNC kit.
b) 41 feet 26 awg wire.
c) 17 feet 26 awg wire.
d) 1/2" PVC wire winder, one of the short pieces can be detached and used as an insulator to tie the antenna wire to support cord. 
e) UHF(PL-259) to BNC(female) adapter.
f) 100 foot spool of strong cord for support line.

In Conclusion: With Adam K6ARK antenna matching kit you have the smallest, lightest feed point connector possible, you can leave the heavy coax cables and large gauge antenna wire in your shack. If portable QRP operation is your thing whether atop a mountain summit, sitting of a park bench or just hanging out in your backyard you will enjoy using this kit. 

Monday, January 11, 2021

Jan 08, 2021 - WEN Generator Maintenance

 Jan 08, 2021 - WEN Generator Maintenance

My WEN Generator has a tiny,  impossible-to-find-locally Sealed Lead-Acid battery used for the electric starter.  It is constantly out of stock on the WEN replacement parts website.  

I've placed a 1100mA smart charger on the battery when not in use ever since I brought the generator back in November 2018. 

The generator is stored covered in the unheated carport so having the small charger keeping the battery juiced and ready to go during these cold Maine Winter nights gives me some peace of  mind. 

I replaced the plug in battery clamps for a set of plug in ring terminals. I also secured the detachable part of the ring terminal cord to the generator frame with cable ties. 


I replaced the large sized generator cover I brought along with the generator with the medium sized cover that is recommended for this model. I notice the new cover has the WEN logo in the burnt orange color that is now used on the newer WEN generators. 


I brought two extra five gallon gas cans to fill with non-ethanol gasoline from a marina about a 40 minute drive from home. Hopefully this gas will be kinder to my small engine carburetors, fuel lines and metal gas tanks. I always store my gas with the recommended dose of Sta-bil and buy fresh every four months. The two new gas cans will be put in rotation with the older gas cans so if not needed for an emergency power outage I only need to buy 10 gallons of fresh gas every two months.


Monday, August 31, 2020

Portable Dummy Load Revisited 

I had made a portable 50 Ohm Dummy Load using an Altoids tin with six (6) 300 Ohm 2 Watt resistors in parallel.  This allowed me to test any of my QRP transmitters rated under 12 Watts such as my BITX40.

With the Xiegu G90 Transceiver rated at 20 Watts, I would have to be sure to turn the transmitted power down every time to use my old dummy load. 

I bought ten 510 ohm 3 Watt resistors.  I place two bundles of five resistors apiece, twisted leads together and soldered. After both ends of each bundle was soldered. I unsoldered the original six 2W 300 Ohm resistors and replaced them with the two bundles of five 3W 510 Ohm resistors. This should provide a 51 Ohm load with a max power rating of 30 Watts.

The Diode is a Schottky diode to rectify the RF signal to provide a measurable peak voltage at the banana connectors. Thus peak and rms Power can be easily calculated.
   

The inside of the Altoids tin with new resistors in place. 

73 AB1OP Ralph

Wednesday, July 1, 2020

AB1OP - 2020 ARRL Field Day


Objectives:

  1. Xiegu G90 - Use the G90 in a portable operation.
  2. LiFePO4 Battery - Test a 6ah LiFePO4 battery as an emergency power supply.
  3. EFHW antenna - Build and use a multiband EFHW antenna for portable operation.
  4. Anderson Powerpole Connectors - Convert all my field portable equipment to power pole connectors.
  5. Downsize - Try to reduce / resize radio gear for effective portable operation.
  6. BE SAFE & HAVE FUN!

Preparation:


Prepare Radio gear for packing.

 What I packed for Field Day:


 66 ft 18 ga wire for EFHW 40-10M antenna
50ft RG8X Coax PL-259 connectors (20ft close wound on a coffee creamer container - air choke)
49 to 1 EFHW transformer (a PL-259 and wing nut connectors)
Sling shot Antenna Launcher
Nextbook 7 Android Tablet for QSO logging with 5000mah USB battery Bank for recharge.
Backup Paper log in clam shell clipboard (black case under the tablet and power bank)
300ft Reel of 100# line for antenna deployment.(green reel) with spare line.
Small Tool Box (black w/ yellow handle)
Xiegu G90 20W 160-10M transceiver with power cable.
Small plastic Ammo box (30 Cal) for LiFePO4 battery box, cable storage, VOM, spare fuses, etc.
Xiegu G90 microphone. 
Bug Spray.
Golf Umbrella  

Deployment:


Radio gear as deployed

Xiegu G90 propped up on a plastic tub.
Battery out of the box for size comparison. Small black box next to tablet is a home brew battery monitor (mini LED voltmeter, 2 pair power pole connectors and two lengths of 12 ga solid wire, in an ABS box) 

Results:

I operated for 3 hours Saturday afternoon. In the first two hours I was able to log 9 contacts on 40 meters, then moved to 20 Meters and did not make any contacts in the remaining hour . My poor results I can only attribute to a reluctance of mine to jump into pile ups. My EFHW was almost completely vertical so that is why most of my contact were about 400-600 miles to the South West. I did have one contact to the East. (See attached Map)


I wasn't able to participate on Sunday. Family obligations and pending scattered thunderstorms in my area caused my early withdrawal. 

Conclusion:

I met every objective I had with the exception of working multiband 40 & 20 meters.

I was able to claim 168 points (9 QSO's X2 for Low power, 100 points for 100% emergency power and 50 points for Web submission of cabrillo log to ARRL. 

I was very happy with the VLS Logger android app. It was a smaller footprint, lower power option to bringing a laptop into the field for single op logging. 

I am thinking adding an optional bluetooth keyboard to the tablet, but I'm concerned on the tablet's power consumption. With wifi turned off and display at a readable daytime brightness I only operated 2.5 hours before needing to attach the power bank.

An objective for next year will be to resize my antenna to a smaller size more in line with my maximum 20W output. Shorter RG58 cables with BNC connectors, a smaller 49:1 Transformer and a 1:1 choke using RG172 and FT118-43 toroid core that would fit in a altoids size case using BNC connectors.

As Solar panels drop in both size and cost. Adding a solar panel and controller might be doable by the  2021 field day.


73 de AB1OP Ralph

Addendum:


Sample of my Field Day 2020 eQSL design. 


Thursday, May 21, 2020


New Ham Antenna Launcher

Shelton 3.1 lite - Shooting position,  the pill vial is the steel stinker storage
Gorilla tape covers the 3 inch angle bracket leg that is screwed into the front of the Slingshot handle.
Gorilla tape also covers the leg of angle bracket zip tied to the pill vial and the Zebco 404 reel.

I 've tried several antenna launching systems over the years.  I think the first method was to put a handful of gravel in an orphaned nylon dress sock. Tie it on a string. Swing it around a few times (screaming like a chicken) and cast it into the trees. The cons of this method is you need to wear leather gloves to prevent rope burns, somewhat inaccurate and even a nylon dress sock hangs up in a pine tree sometimes.

Next I tried a collapsible backpack rod & reel with a 1 oz torpedo sinker. The reel was a Zebco 202. I spooled 20# test mono line until the reel was full. I had problems with the tall pines tress. The sinker would wind up just out of reach overhead, I would have to remove the line from the reel. Tie extra mono to allow me to reach the sinker. Remove the stinker, tie on the light hauling line. Pull the extra mono hand over hand back over the storage spool. until I reach the end that goes into the Zebco 202, retie the line onto the reel and crank the mono line all in. Finally getting to the haul line to actually raise the antenna. This system was also prone to having the sinker spin around a branch several times making retrieval impossible.

I broken down and purchased a JARC antenna launcher kit. The kit had all the PVC pieces to construct an air cannon launcher and two "pucks" to attach the mono to. I had to provide an air pump and a reel. I knew that the Zebco 202 was too lacking in line capacity.

I wound up buying a Zebco 888 preloaded with 110 yards of #20 test. I now could reach over those 100'+ tall trees my only concern was losing one of my two "pucks". The only time this system failed was when I broke the air pump and had to run into town to pick up a $12 replacement. 

After that failure and the fact that the air launcher was bulky and cumbersome. I decided to have a backup system that was more pack friendly if I wanted to do POTA or portable operating.

I remember George Thomas, W5JDX of AmateurLogic.tv and Ham Nation using a slingshot for his early ARRL field day ALtv videos. After a while I stumbled on N0KTZ "Rusty" youtube video that shows how he builds his "Shelton 3.0 Magnum" slingshot launcher which inspired my build.  https://youtu.be/ZtJvTQ2oogQ

    
My Three Antenna Launch systems

Screwdriver, Air gauge, Air Pump, "Pucks", 5 spools of cords
Air Launcher's large air chamber with ball valve
Air Launcher's Barrel with Zebco 888 attached
Backpack rod with Zebco 202 attached, rod holder
Torpedo sinkers, Snap swivels, 2 green Kite reels with 300' 100# line
Shelton 3.1 lite Slingshot with Zebco 404 and pill vial attached
4 one oz steel bass weights painted (fits in pill vial)
4 packs extra steel bass weights
MISC:
zip ties, 3in angle bracket, snips, extra mono line, gorilla tape
Storage box for Air Launcher
aerosol paint cans

I departed somewhat from N0KTZ bill of materials. He used PVC irrigation components brought from a "Big Box" stores. I used a 3 inch angle bracket and parts obtained thru my local Walmart.  I am calling my build the "Shelton 3.1 lite". 

My parts list follows:
  • Daisy F16 Slingshot                                                      <$5 USD
  • Zebco 404 spincast reel (w/ 75 yds #20 test mono)      <$10 USD
  • 1 Angle Bracket 3 inch (comes 4 per pack w/screws)    <$3 USD
  • Walmart Rx Pill Vial  (to hold sinkers)                          Free w/ Rx
  • 3 zip ties                                                                          had on hand
  • Gorilla Tape                                                                    had on hand
  • 2 packs Eagle Claw Steel Bass Casting Sinkers 1oz.   <$4 for both packs
So my total was less than $25 USD, while at Walmart I bought extra steel bass casting stinkers and a sand rod holder to hold my kite reel to unspool while I'm hauling the line back over the tree from the other side.

Shelton 3.1 lite - Line retrieval made easier by holding the handle with the slingshot upside down


Thursday, April 23, 2020

HF Antenna Maintenance

12 April 2020 - 18 April 2020

I had a long hiatus from posting my hobby blogs. My XYL's mother passed away last year and there didn't seem to be any excess time available to both do a hobby and post a blog. Just as things started to pick back up for us and we even bought a new dog the pandemic hit with social distancing, self quarantine and lockdown.

This year Winter's snow load was light, but we still had a several blustery days that took their toll on my 40 meter dipole wire antenna support ropes.  I had two separate failures one was the paracord supporting the feed point and the other was one of the mason lines used to tie down the "legs" of the dipole.  

This was my second (third?) Winter using these cheap support lines. So these failures were not unexpected.  The support trees were Eastern White Pine (State Tree of Maine) The deep corrugated bark abrades the support lines with each wind gust,  I decided to buy support rope that was designed for long term outdoor exposure and stop the false ecommunity of continuing using subpar lines.
Brought 500 feet of 1/4 inch Dacron rope. I hope this is about twice the length of what I need to support the antenna as a messenger line. I used my Joplin ARC antenna launcher (air cannon) to get one end of the line up and over the closest pine tree to the eastern side of the house.
I walked the rope end over and threw it up onto the back shed roof. I then used the antenna launcher to bring a haul line over an old snag in the old dog pen.
I then had to go onto the shed roof and haul rope to thread the eastern end insulator, the feed point assembly and the western end insulator. Pulling enough rope to make it up and over the snag limb with an additional 35-40 feet for raising and lowering the antenna to the roof.
I would like to say that things went smoothly but as often the case. If you're on the roof there is a problem on the ground and if you're on the ground at one end the problem is on the other end or back up on the roof.  This would have been easier with an additional helper or two. Not happening with social distancing. I did have my XYL act as a spotter with 911 on speed dial. I ended up doing this over the next few days when the temperature warmed up and the wind gusts calm down enough.
I then had to haul up one side of the rope then the other with the XYL checking to see if the dipole and rope would clear the radials on my VHF antenna mounted on the west gable end of the house.
With the dipole raised and the rope ends tied off, I could finally go into the shack and check out the performance. I had lengthen each dipole leg to the length recommended for mid-phone frequency. The best SWR tested was in the lower CW frequencies but it will do for now. I'm tempted to move the eastern leg of the antenna to a tree farther from the house, if I do I'll go for a better tune for SSB.
Until then I can finally get some more use out of my BitX-40.
73 de AB1OP_Ralph

Thursday, January 30, 2020

Cribbage Boards No. 005 and No. 006

Cribbage Board Prototype No. 005

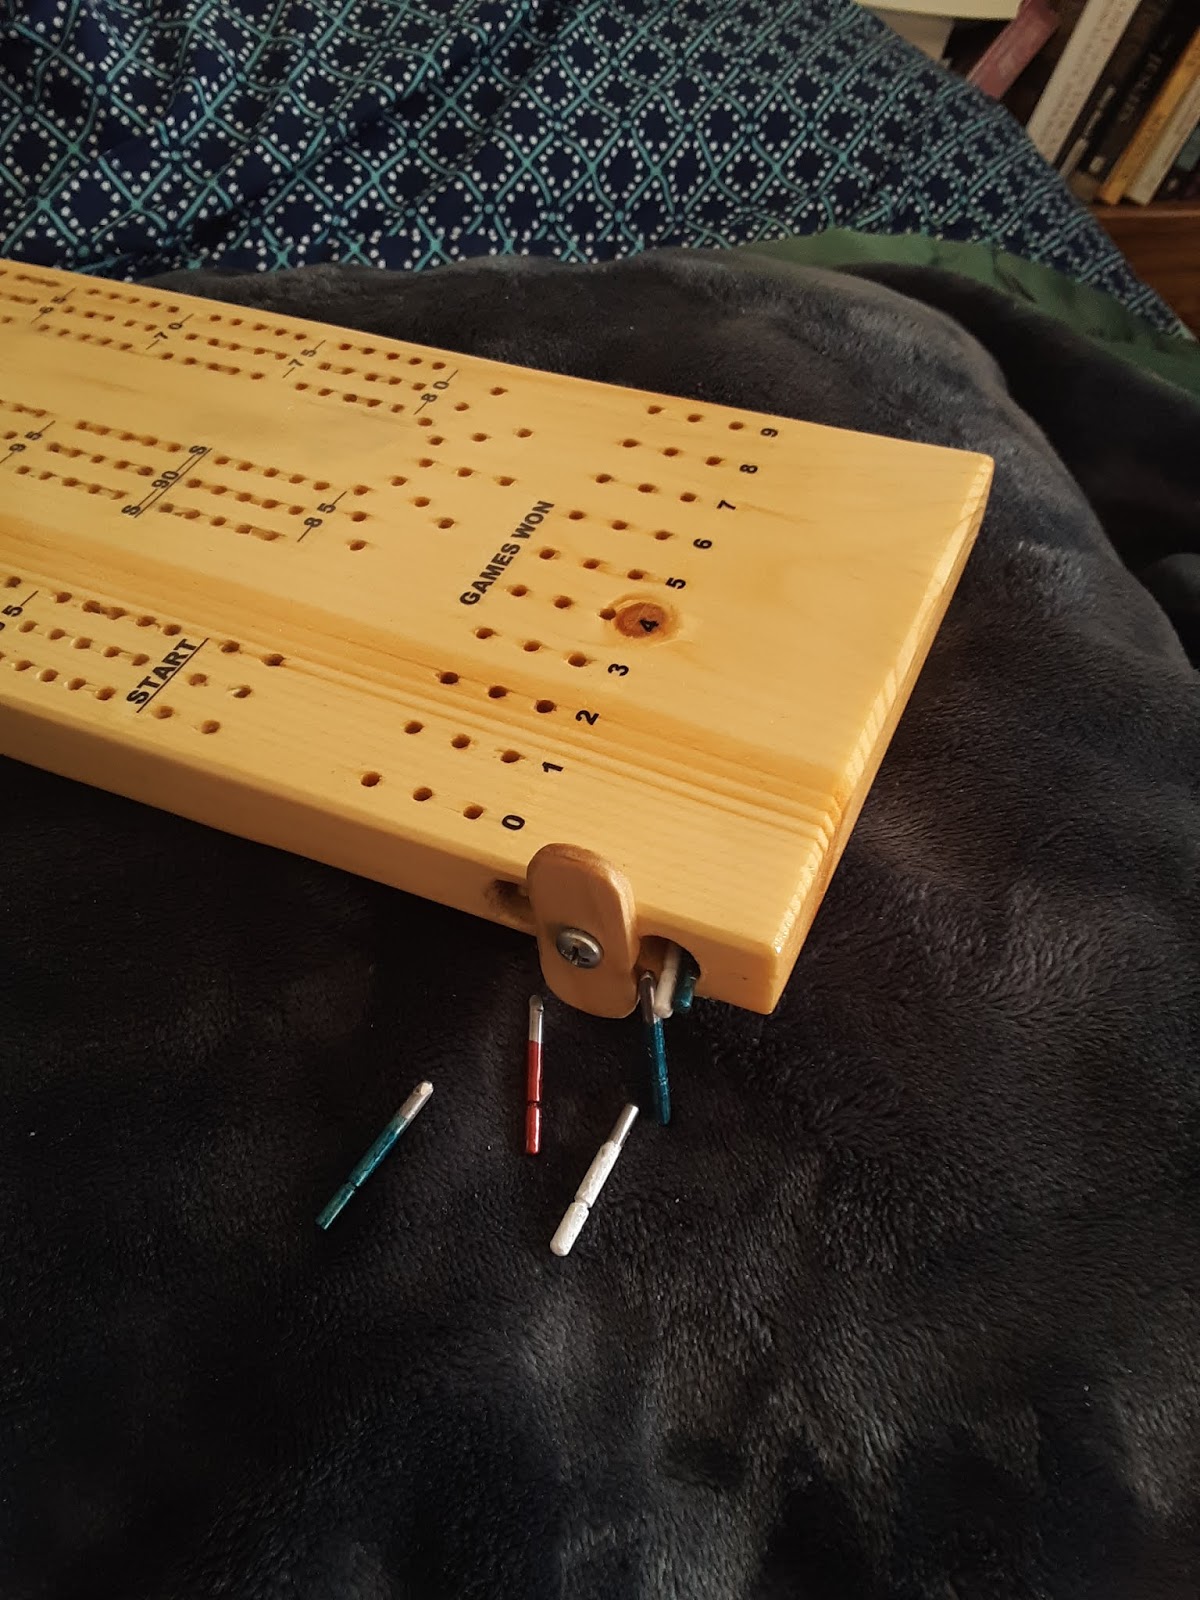
No. 005 is a 20 inch pine 3 track cribbage board.  Lettering was using water slide decals.
Games Won peg holes are on the end of the board as how the Rockler Template has placed them.

Pegs are cut from #10 finishing nails and painted 3x with cheap enamel nail polish.

Finish was two coats polyurethane wipe on, drying each coat completely overnight . Apply lettering waterslide decals, blot and air dry 3-4 hours, followed by two coats of spray on polyurethane (3-4 hours between coats) to protect decals.   


No. 005 with Games Won peg holes on the end.  Peg storage is in two  3/8" holes drilled into the side of the board, a turnbuckle cover turns halfway to open holes to access the pegs, turns halfway again to close. 
No. 005 Cover Closed
No. 005 Cover Open


No. 005 Bottom side with felt pads


Prototype No. 005 was my first attempt at lettering cribbage boards with water slide decals.  I found while finishing the boards with wipe on polyurethane after decals were applied may cause the decals to lift and stick to the wipe pads or brushes.  Spray on Polyurethane after applying decals gave the best results with two coats (3-4 hours between coats).

I am not really happy with the peg storage being 3/8" holes with 5 pegs in one and 4 pegs in the other.  Drilling the holes needs upmost care not to break thru the top or bottom surface of the board. I drilled the holes crossed grain from the side because I was afraid to split the wood drilling with the grain from the end.

Cribbage Board Prototype No. 006 

No. 006 is a 15 inch pine 3 track cribbage board. Lettering was using water slide decals.
Games Won peg holes were placed in the open spaces along the spiraled tracks. 

Peg storage was routed in the underside of the board using a 5/8" straight bit 1/2" deep, followed by a 3/4" dovetail bit 1/4" deep.  I tore the dovetail edge so I did a second pass and widen the dovetail to 1". I used two Jumbo craft sticks glue atop each other for the sliding storage door. 

Pegs are commercial pre-stained wood pegs that have 1/4" diameter heads and tapers to 1/8" points. It is a tight fit in the storage compartment with nine of these pegs. 

Finish was two coats polyurethane wipe on, drying completely overnight after each coat. Apply lettering waterslide decals, blot and air dry, followed by two coats of spray on polyurethane to protect decals.   

No. 006 showing water slide decal lettering  and alternate placement of the games won peg holes.


Bottom side peg storage compartment and lettering details. The compartment holds nine wooden pegs required.  Check out the use of jumbo craft sticks as the sliding cover.
Note: picture was taken before adding the 1" felt pads for each corner.

Thanks to my Rockler 3 person track cribbage template making hole placement easy.
A lot of lessons learned with this prototype.  Especially in using a wood router.  I got a WEN plunge router as the best value for money spent,  It has variable speed and soft start and I brought 1/2" shank carbide bits for it. I used only three bits the 5/8" Straight, 3/4" Dovetail (14 degree) for the peg storage compartment and the 3/8" round over with bearing for the edges.

If I were to do it over I would have gone with a one-handed trim style router using 1/4" shank bits.  The big WEN is great for cabinetry and moulding, but feel heavy and cumbersome on these small cribbage boards.  

Friday, December 20, 2019

Merry Christmas for 2019

My Christmas gift projects.  Making Cribbage boards.

Like every guy that getting up there, you have to make a few DIY Christmas gifts.

This wasn't my first attempt at cribbage board making. I made one back in 2013 using a downed birch tree limb, a graph paper template and a 1/8" twist drill with a tape flag drill stop in a hand drill. I will call that one Prototype No. 001 although it was probably better suited to be used as firewood.

Buying the Rockler Small Cribbage Board Templates, 3-Player, Curved Track
 with self-centering drill bit allowed me to use a few hand tools. No drill press required! 

To keep costs down while learning to make a usable cribbage board I bought common 1x6 pine board from the local lumber supply. (16 feet of pine at <$14 was more wallet friendly than hardwood) So I'll either get inexpensive cribbage boards for Christmas gifts or expensive kindling for the woodstove.

I then travelled down the path of the Old Fogey. Retiring into the man cave with the sign on the door "Do Not Open 'Til Xmas!" 

My first attempt (Prototype No. 002) was the ambitious swing-away cribbage board with the pegs and cards stored in a second board underneath. Rockler kindly provides a downloadable instructions in a PDF. ( I did not using ANY of the recommended hardwood$ listed in the instructions!)

I made this a two person game board by only drilling two of the three tracks on the template.  The pegs and cards storage space was drilled out of the second board with a small Forstner bit, then using a jig saw to cut between the holes until the waste material drops out,  I then glued a 15" x 5.5" piece of thin plywood to the underside of the storage board. Cut pieces of green felt to fit into the storage space. Final assembly was to drill a pilot hole for a 1.5" flat head screw in the two boards and fasten to allow the top board to pivot.


My second and third attempts (No. 003 & No. 004) were both single boards of 18" x 5.5" x 0.75" dimensions.  

( In the fore ground second board is completed, while the third board is still being worked on.)

Peg storage is in a 5/8" wide by 1/2" deep slot cut in the top of the board.

Magnets glued into the slot holds the pegs made from heads of  finishing nails, painted in three colors using dollar store nail polish. Youtuber Crafted by Christoper shows you how.


I applied oil based polyurethane 3 times to the wood, wipe, let dry and buff between each coat. 


Add four self stick felt pads to the underside, scrawl the date and my signature. Done!


Add a new deck of cards and my DIY Christmas gifts are ready to be wrapped and put under the tree (or in the wood stove...)

Friday, July 12, 2019

AB1OP now has a banner!

July 10th, 2019 - Received my banner ordered from Printastic I designed a 2x4 foot banner using their online design tool. I uploaded two clipart files from my PC and placed them in the design with my text and two clipart files from Printastic image library.
Design was finalized as in the photo.
Banner specifications as ordered:  2x4 foot, 13 weight Vinyl, Hemmed all four sides, Grommets in corners and every two feet. (six total)  Price was $20 USD for one banner and an additional $10 USD for shipping.  Discount for additional quantities available.
Banner arrived rolled in a cardboard box - with no folds or creases. Artwork and text were crisp - no fading or bleeding.
Time will tell how it will hold up to the elements but considering I'll only be using it on Field Day and Portable (FBOTA - Fat Boy On The Air) expeditions it should last me several years.
73 de AB1OP Ralph